

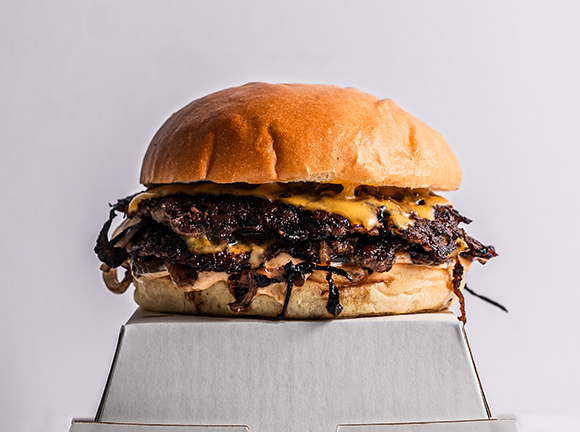
Currently one of my most favourite burgers, and one of the most simple.
The fried onion burger - also known as the Oklahoma smash burger or the Motz burger - made its appearance on our menu a few months ago and since then has amassed a cult following.
What makes this burger so special is the variety of marrying between ingredients that occur throughout the cooking process, through smashing your beef patty on the grill with the onions on top.
What you'll need:

Buns
Buns
For your buns, while you can be completely flexible, the ideal choice would be a Martin's potato roll. These buns are world famous and used by massive burger joints all over the world, however as with most things, they're pretty hard to find here in Australia. Considering such, you can grab any brioche bun that Woolies/Coles typically sell - as long as you stay away from those tough cheap burger rolls from the bakery. I hate those with a passion.

Meat
Meat
If you've attempted to smash burgers before, you'll know this one is quite important, especially for the fried onion. For this burger to properly work, you're counting on the fat content in the meat to render out and essentially 'fry' the onions underneath the patty. If your meat is too lean, the onions beneath the patty will only become soggy and flavourless, which is what you don't want at all. So when you head out for supplies, look for beef mince that is minimum 20% fat.

Cheese
Cheese
Now I get questions about cheese ALL THE TIME. It is in my humble opinion that the only cheese that should be on a beef burger is American cheddar, the yellow block one. No, this is not 'plastic cheese' as some people may refer to it, 'plastic cheese' are the glossy individually wrapped ones that you'd typically have on a vege sandwich. Now where do you get them from? Besides wholesalers, you can get some solid American cheddar from Coles, under the label of 'Dairy Lea Burger Slices' or Costco who sell the massive packets. If you can't make it out to buy the real deal, fair enough, but it really makes a difference.

Onion
Onion
The main event! I haven't really put much thought or experimentation into testing different onion types, because if it works why mess with it? So what you want to grab are some nice big brown onions.

Extras
Extras
Now in the food truck we sell this burger with pickles, mustard and Chebbo's sauce. Why? I feel like it would allow the burger to be more easily consumed by everyone, as opposed to having people freak out as to why there isn't any sauce or toppings on their burger. So I'll leave this section up to you. I've even seen people do it with lettuce and tomato, but I would only recommend going as far as pickles/jalapenos and sauce.
Preparation
To begin, you want to grab your brown onion and slice as thin as physically possible. What this does is give the onions the best chance at getting caramelised and crispy in the short amount of time that they're cooking. Remember, we aren't pan frying these onions or deep frying, we're cooking them with the meat and don't have time to wait for the onions to cook longer than the patty.
After slicing your onions, begin to roll your beef mince into balls (soon to be smashed). Now depending on personal preference - you can go anywhere from 90g to 100g but I wouldn't personally recommend anything more than that as it may interfere with the patty cooking process.
Now that's pretty much it for prep! You can prepare a special sauce or mustard (we use both in the trailer) but for the sake of the simple recipe I'll leave it out and let the magic come from you.
Cooking Walkthrough
01
Crank the heat
You want to begin with your cooking surface as hot as possible! While you can cook this on a non-stick pan, you ideally want cast iron/stainless steel or an outdoor griddle for the best results. This burger does get messy so be careful indoors. Crank the heat as high as you can and wait till you see the surface begin to smoke - that's when you know it's ready. Why so hot? The heat allows the meat to stick to the surface of the grill giving you that amazing crust.
02
Smash time
Now where things start to look a bit different, place your patty on the grill, place a handful of your thinly sliced onions on top - then smash! Yes, you smash the onions WITH the patty. This allows the onions to absorb moisture and begin to mix with the rendering fat - to then cop a nice caramelisation once flipped (don't forget to hit it with a bit of salt).
03
Flip and top
It does get tricky knowing when to flip your patty, but essentially you want to flip once you see only a bit of pink/raw meat left. To flip, grab a paint scraper or sharp spatula and begin to essentially scrape the meat off the surface first, before flipping - allowing you to preserve that nice crust. After flipping, place a slice (or two) of cheese and your crown (top bun) on top and the heel) above that. This allows the buns to begin to steam above the cooking patties/onions, allowing them to get nice and soft. You may also want to turn down the heat so that the onions don't burn before caramelising.
04
Assemble
After you begin to see the onions beneath the patty become a rich colour, it's time to remove the patties. Take off the heel, and place it on your benchtop, or wherever you're assembling, scoop up the patty, put it on top and that's it! Obviously there's more steps if you have more ingredients, however you're now left with a perfectly soft, indulgent fried onion burger.
Make sure to eat this burger while it's hot, and even better if the weather is cold. This burger is bound to sink you in your seat.
If you enjoyed the recipe or have any feedback, make sure to let me know and I'll try get more done!
Happy Cooking <3